
16 Aug QUEST – earn XYM from performing tasks or streaming content!
I wanted to try QUEST out when it was on testnet but never found the time to do it. Now that it is live on the Symbol mainnet I am sure that there will be a lot of interest in it so I have set myself a quest and will be writing up my experiences of using the platform and providing a guide in English here on Symbol Blog. I really hope that it takes off worldwide as the developers have done a fantastic job and it is a great concept that is a showcase for Symbol technology.
What is QUEST?
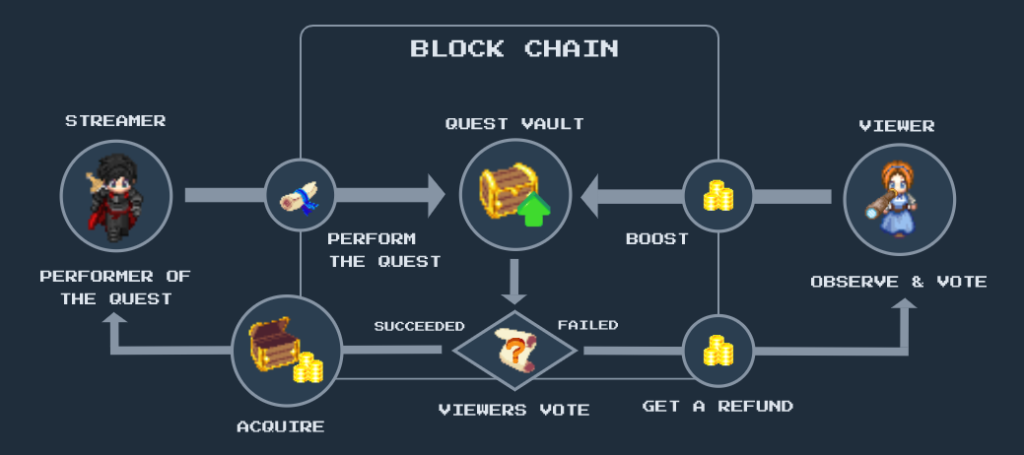
Quest is a new platform that is developed on Symbol that allows users to create tasks (known as quests) and receive tips or “boosts”, from viewers. Unlike other similar platforms there is a real monetary incentive to take part (you get paid in XYM!). It also requires the performer to successfully complete the challenge that they set themselves before receiving the boosts from their viewers. This stops the performer from promising something spectacular, receiving lots of boosts and then making off with the money and not completing the quest that they set themselves.
The concept is relatively simple but it is actually very powerful. The person that creates the quest is the “performer” and the viewer is a user that watches the performance. The viewer has the option to boost the performer and the boosts from each viewer are stored securely in the “quest vault”. This is where it gets interesting..
The performer has to complete their quest within the deadline before the funds are released to them. For example the performer might set themselves a task of finishing a game level within a specified time limit; show off their sporting prowess by making a difficult shot; developing a tool or, writing an article (like me!). Really the possibilities are endless!
After the performer completes the quest there is then a decision on whether the conditions have been met before the funds in the quest vault are distributed to the performer. If the conditions are not met then the viewers would receive a refund for their boost rather than the funds going to the performer.
There are three quest validation options or “boost strategies” available and these can be chosen separately by each viewer who boosts the quest (e.g. viewer 1 can choose option A and viewers 2 and 3 can choose option B). The options all provide differing levels of security to the viewer which are explained below:
A) The viewer trusts the performer to do the right thing and they should receive a reward regardless of the voting outcome. This requires a lot of trust in the performer and maybe the platform would benefit from a reputation system to give some degree of confidence to the viewers that a particular performer can be trusted. Option A might be used e.g. if the performer is a friend of the viewer and they trust them.
B) If after voting, the majority of viewers that they completed the task satisfactorily then the funds are dispersed to the performer. If not then the boosts are returned to the viewers choosing option B (but not A).
C) All viewers vote on whether the task was successfully completed but the user choosing option C has the final say on whether the performer receives their boost or not.
Regardless of the strategy chosen, all viewers will be able to vote on whether the task has been successfully completed.
As you can see, the viewer is required to pay a small fee for the different boost strategy options with A being the cheapest and C the most expensive:

That was the introduction to the platform so now it is time to give it a try! I will try to write this as a step by step guide so that you can follow but the platform is quite intuitive once you understand the concept.
Setting up an account
The first thing I need to do, since I am using QUEST for the first time, is to set up a new account. The initial step is to make sure that you set the language in the top right hand corner (in my case it is English or EN). Then just enter an email address and password that you will use to log into the site.

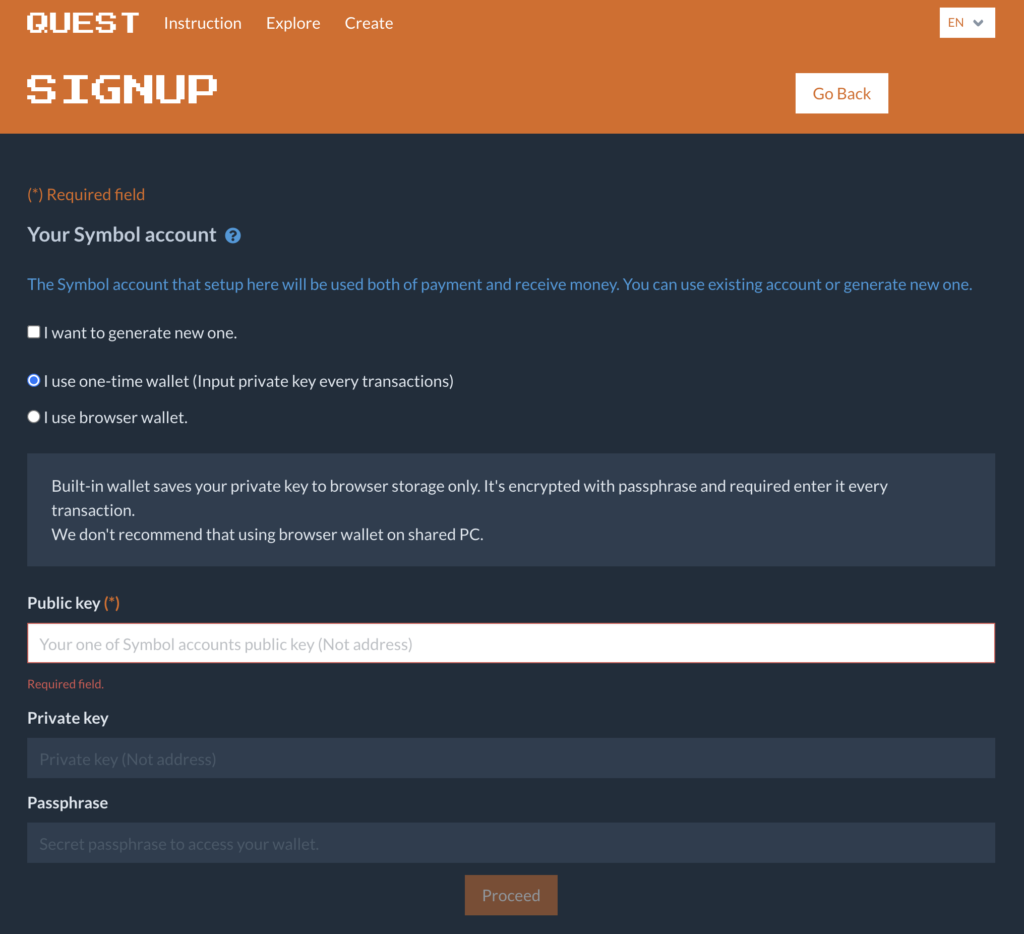
The next step is to link your account to a Symbol address. This is needed for both payment and receipt of funds. You will be paid to this address if anyone takes you up on your quest and you receive boosts from the community.
There are several options here, you can choose to set up a completely new mainnet account by checking the relevant box or you can use an existing mainnet Symbol account. I chose the latter and opted to use a browser wallet which stores my encrypted private key locally. There is also the option to use a one-time wallet which would require me to enter my private key every time I made a transaction.
Both options do not send your private key to a remote server and they are stored (encrypted with your password) locally. As the site warns, you may not want to use a browser wallet on a shared computer since other users may be able to access your encrypted private key. For this reason it is more secure to use a one time wallet.
Another tip for the security conscious or paranoid (like me!) is that you can set up a new account for this rather than your main account containing all of your XYM stash. I created a new mainnet account just for my QUEST experiment. Finally as you need to enter your account private key you cannot use QUEST on an account secured with a hardware wallet such as your Ledger device.
Finally you will be asked to choose a display name and your language preference. I set my account up with my Twitter handle XHarvesting. You can also enter URLs of streaming services or other platforms that your audience will use to watch your quests or keep track of your progress. I entered my website Symbol Blog where I will host a draft of my article and you can follow its progress!

You can also edit your profile by clicking on your avatar and clicking the “Settings” button. Here you can manage your general setup including avatar picture, your payment options and more.
Setting up a quest
Great! So you should now have your account set up and you are ready to roll with your quest! Just click the “New Quest” button under your avatar and you can enter details about what you plan to do and can then activate your quest.
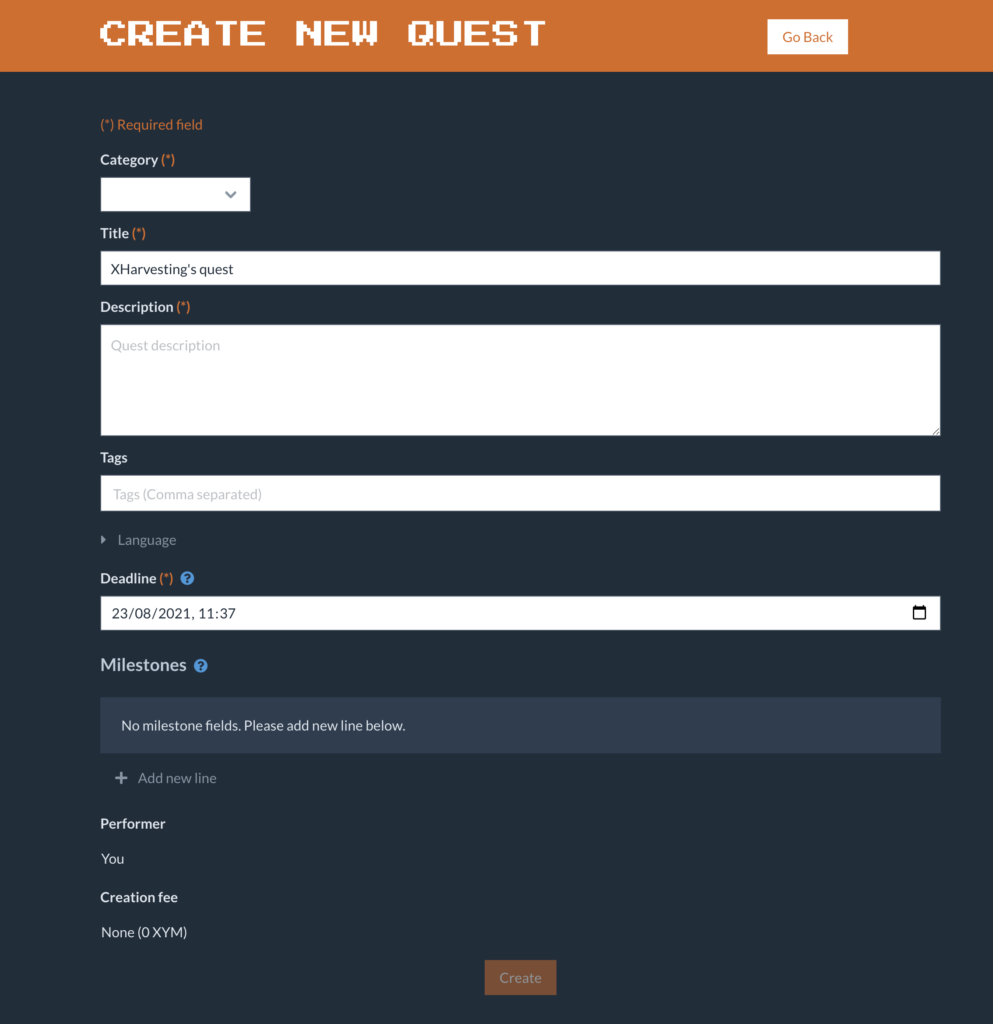
As you can see, you will need to choose a quest category from the following options:
- Gaming
- Physical Sports
- Motor Sports
- Outdoor Activity
- Technology
- Creative
I think that there could (or maybe should) be more options here. I wasn’t sure where my writing quest would fit so I chose “Technology”. You will also need to choose a title and give a description of the quest so that your viewers know exactly what it is that you (the performer) intend to do.
You then need to set some keyword tags to make your quest easy for people to find and very importantly set a deadline for task completion. By default this is to 1 week from the time that you set the quest up.
It is also possible to set some milestones for your quest. In my case it could be that I would finish e.g. the first section of my article within two days or if you had a coding task you might want to release a beta version within a certain number of days/weeks.
Once you have entered all of the details you have the option to make your quest live so it is viewable by other site members. Remember that once it goes live the clock is ticking and you need to get working on your quest!
Viewing your quest
Once your quest is live you can view the details and check to see if anyone has given you a boost. I just checked mine and I have one boost! 🤩 Thank you Tresto for your generous contribution!! Edit – a couple of hours later and I have some more boosts. Thank you guys!! ❤️
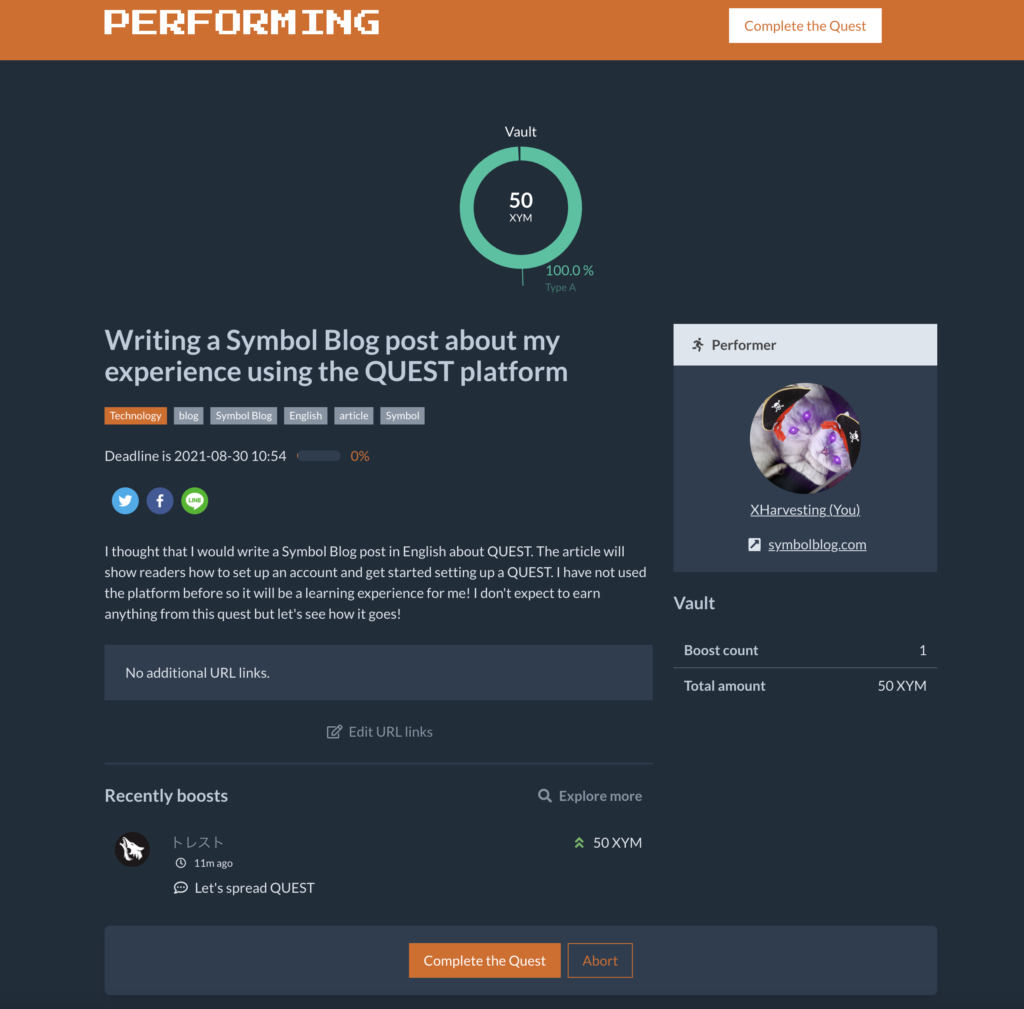
As you can see you can add additional URLs to your quest so I am going to test this out and add a link to a draft of my article so that you guys can follow my progress as I write. I think after this I may take a break and come back to it but I want to show that I am working hard on it and this will give my viewers some confidence that I am going to stick to my word and publish the article before the deadline.

There are also icons to publicise your quest on social media. At the moment there are options for Twitter, Facebook and Line – this is a handy option and I have just added my quest on my Twitter account!
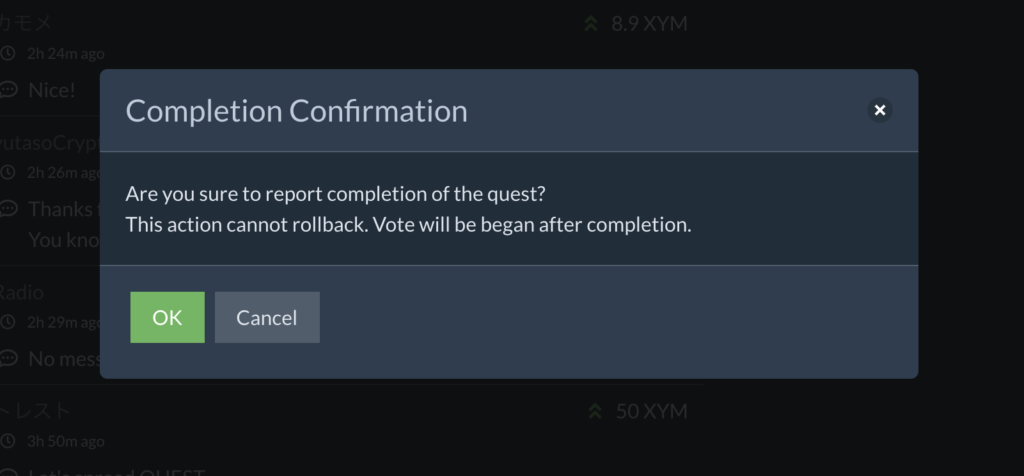
As you can see in the screenshot above there is an option for completing your quest. Once you are happy that you have met your objectives you click this button. I am not sure what happens next as I still haven’t finished the article! 😂
Completing your quest
This is an update added after completing the article! After hitting the complete quest button your quest enters the voting period. I have updated the quest page with a URL for the completed article (well before this edit anyway!) and it is now up to the viewers to decide whether I have done what I said I would.
You can see that in just a few hours I received 8 boosts! Thank you everyone – I really appreciate it! 😊 All viewers who boosted my quest now have 24 hours to submit their vote and it is so far so good for me with 100% positive votes 😁

After voting has ended and if you succeeded in your quest you will get paid directly to the address that is linked to your QUEST account. Check it out! I made 235.7 XYM for writing this article! 🥳
Following other users
There is an option on the site that allows you to follow other users. This is really cool as it allows you to keep up which of the users you follow currently have active quests. People following you will also be able to easily track your active quests too.
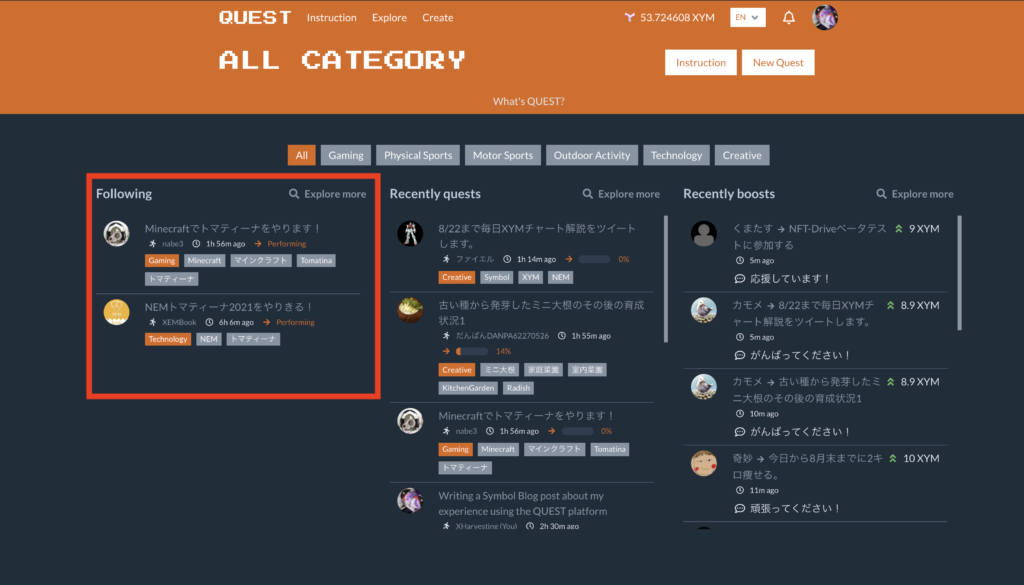
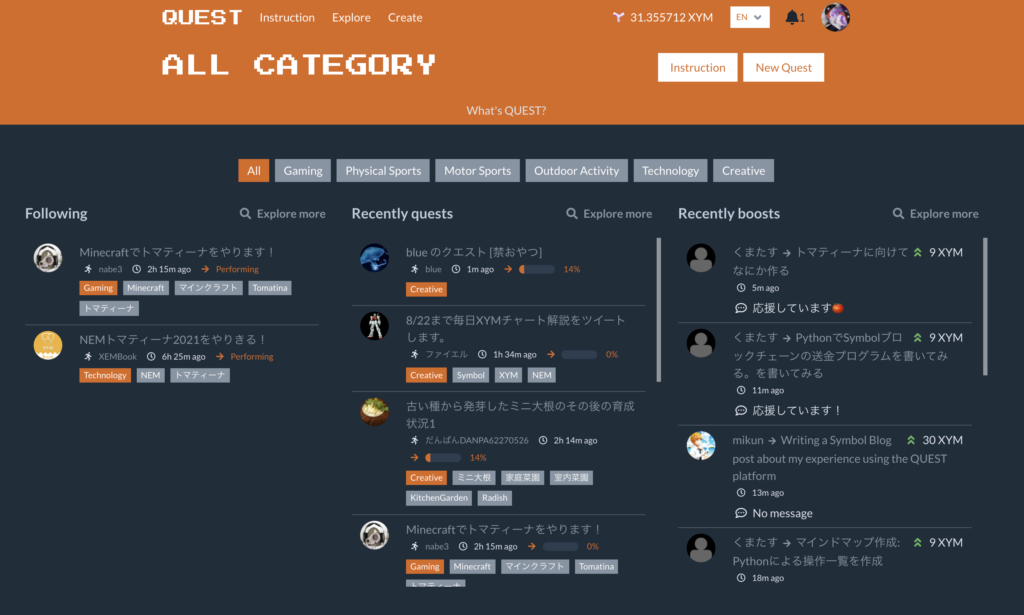
Viewing other active quests
You can browse quests by category and search for keywords that you are interested in. You can also see what your favourite QUESTers that you follow are doing. I can’t really test out the search function as I think that I am the only person that is posting quests in English and I don’t know what to search for in Japanese! 😁
When you do click on the quest you can read more about what the performer intends to do and boost them if you think that it is a worthy cause.
Boosting quests
After browsing the active quests I spotted a post by xembook and decided that this was a worthy cause so I wanted to give a boost.
I have translated the quest description into English below and as you can see he is developing tools for and hosting the tomatina event this year. It is scheduled to take place on August 25th which is not far away!
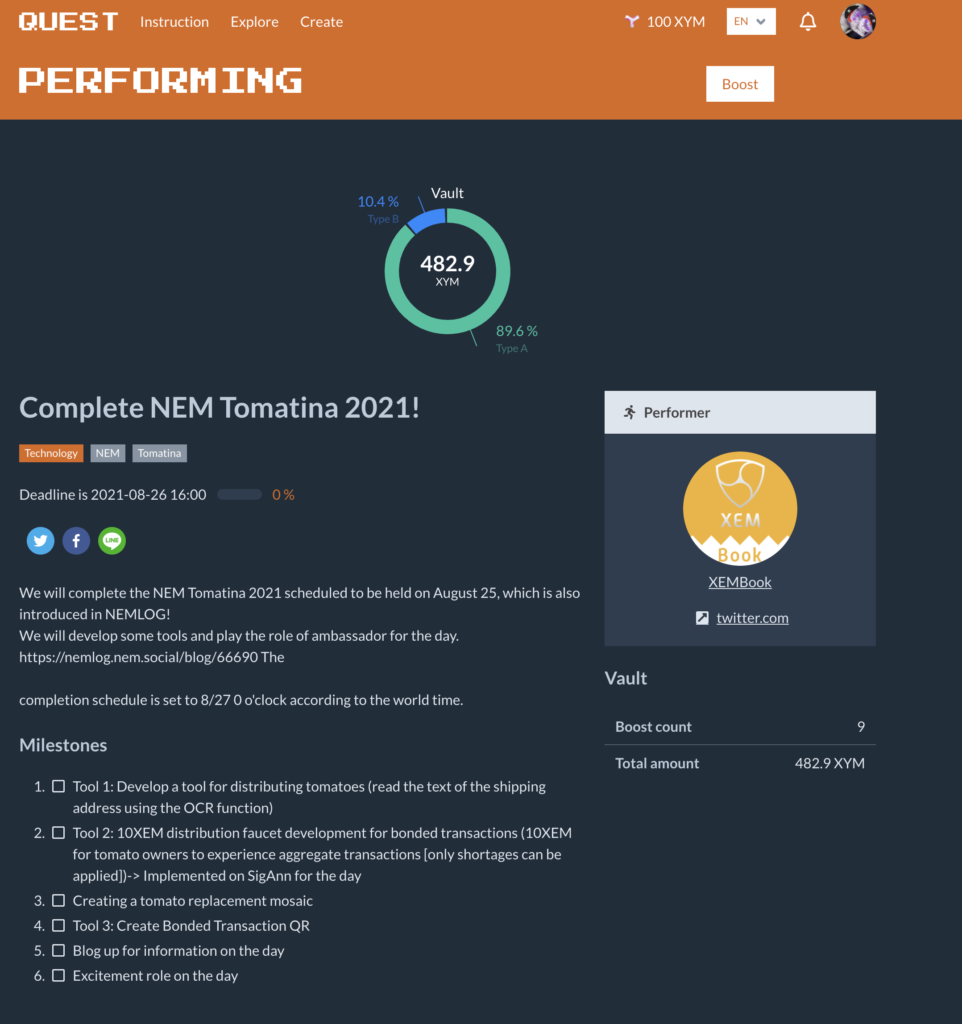
After carefully selecting a quest that you are interested in boosting you just need to click on the “Boost” button on the bottom of the screen. You will then be taken to a separate page to pledge support and leave a message.

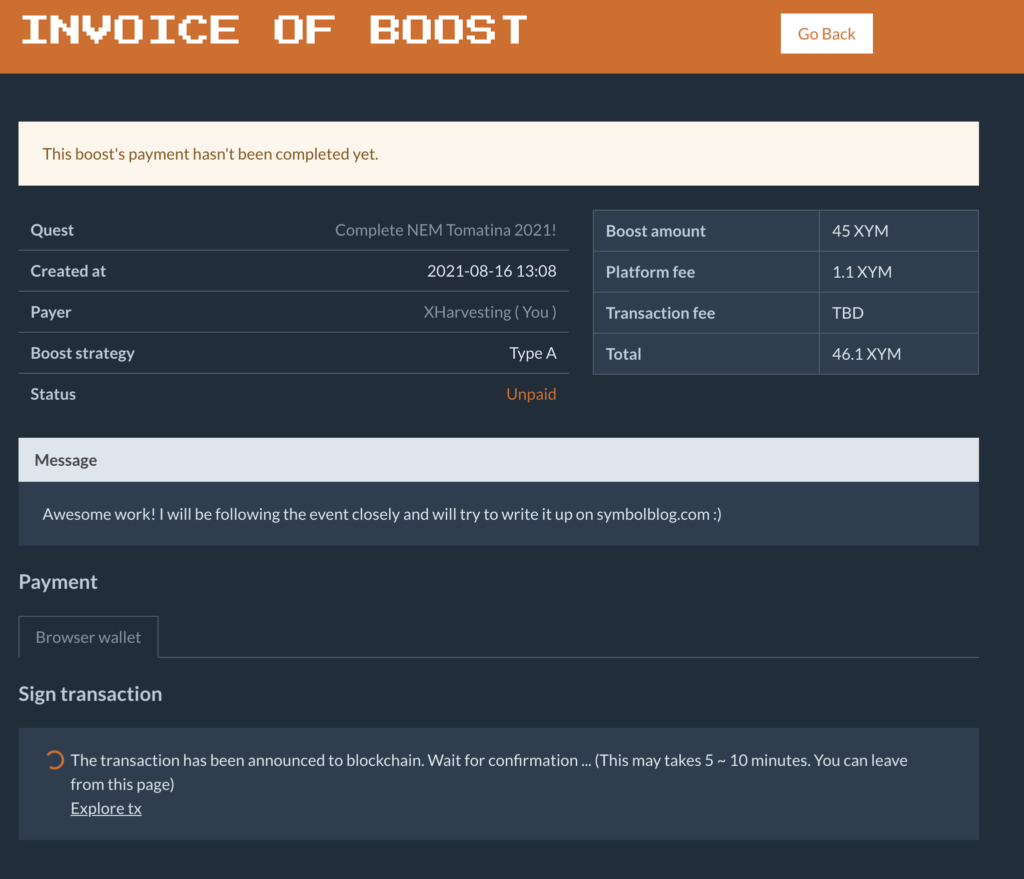
Here you can see that I sent a boost of 45 XYM, left a message and selected option A “trust the performer”. I know xembook’s work and he is a fine trustworthy member of the community so I was happy to trust him to complete the task.
Once you submit the boost you will be shown the details of the transaction including the platform fee (for option A it is 1.1XYM). You will also be able to select the transaction fee, I left it as the default (average) which is estimated to cost ~0.176 XYM. You could set this to “slow” to save a few microXYM though 😊
Next you need to enter your password and the transaction will be sent. If you remember I chose to set up my account in “browser wallet” mode. If you selected “one-time wallet” then I think that you would have to enter your account private key at this stage.

The transaction will then be processed and you will see a screen similar to this whilst it is waiting for confirmation on the Symbol blockchain.
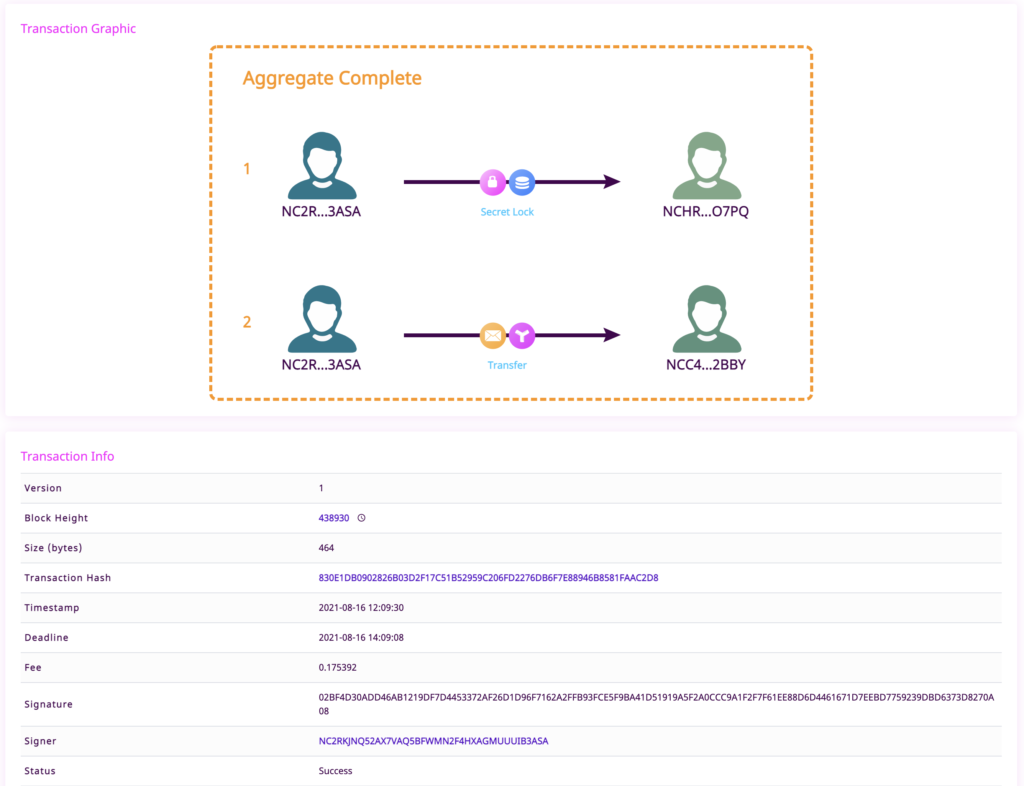
You will also get a link to the Symbol explorer. Clicking on this will show your transaction status – in my case below we can see that it was confirmed! 😎
You can also view all of your boost invoices in your account so that you can keep track of all of the performances that you are supporting.
Feedback
The platform is brand new and the developers have done a great job. I do think that there are a few areas that could be improved or considered though. I tried to keep a list as I was setting up my quest and it would be great to see some of these in future updates.
- It would be nice if you could add milestones and updates as your quest progresses. E.g. a simple diary/journal that you could record your daily progress on the quest would be awesome!
- The categories are OK but quite broad. Maybe some additional options could be added. I think as the site grows it may be difficult to find what you are looking for.
- Although the site is perfectly understandable the English could be improved in a few places. If the developers read this and would like me to make suggestions/corrections to the English text then I am happy to help and offer my services free of charge 😊
- A few people have suggested this before (e.g. @NCOSIGIMCITYNRE) but user requested custom quests would be amazing. This could actually be used to request work such as creating an app or article that they need. It would essentially be like hiring a freelancer to do something for you and paying them in XYM on completion of the task. It could obviously also be used for streaming requests too though!
- Reputation system for users. For example, if using validation method “A” there is no security for the viewer as they need to trust that the performer will complete the task. If there was a reputation system then maybe it would give some degree of credibility to the performer and increase trust from viewers.
- This might also apply to the viewer – if only one viewer is boosting and there is a vote then they can say that the quest objectives were not met and get refunded for the boost. Likewise users choosing option C may decide that they don’t want to pay the performer even if they have completed their quest successfully.
- It would be good to have 2FA to secure accounts
Final thoughts
My overall thoughts on QUEST are that it is fantastic! I love the concept and I think if it gets support from the community and builds some critical mass then it will go from strength to strength. This in turn will lead to growth in the number of Symbol users as they would need an account to use the platform which will lead to higher demand for XYM and this can only help XYM price.
I think it will be tough to start with, attracting new users is never easy so we need to do our part and support the platform, tweet about it and spread the word. It is super easy to use so I highly recommend giving it a go – you can also earn some XYM for providing some entertainment or service to the community.
With NEMHub closing it provides a nice way for users to be rewarded by other community members for doing work that benefits the ecosystem – I like it! I wonder if some of the existing NEMHub funds could somehow be used to support QUEST users that are benefiting the community 🤔
Although I think originally it was announced as being targeted towards streaming it seems to me that many of the quests are technology based and focussed on development and content creation. I think that the platform has a lot of potential outside of streaming and it will be interesting to see how it develops over time.
So that’s it. Thanks for reading and make sure that you visit QUEST!
I’m a Symbol and NEM enthusiast and run this blog to try to grow awareness of the platform in the English-speaking world. If you have any Symbol news you would like me to report on or you have an article that you would like to publish then please let me know!
Sorry, the comment form is closed at this time.