06 Aug Registering Symbol account metadata in Python
This guide is translated from the original Qiita article written by nem_takanobu aka @xembook
In our last article we described how to send aggregate bonded transactions in Python and demonstrated how we could send funds between multiple accounts and gather all required signatures in a single aggregate transaction. In this exercise we will show you how to use an aggregate transaction to assign metadata to another account.
This took me a little while to get my head around when I first looked at the code and I will try (with my limited knowledge) to explain some concepts before we start.
What is account metadata and why would we need it?
Let’s start by describing Symbol account metadata. I think that the Symbol documentation does a really nice job of explaining this so I will steal their description (they also give some code examples but this is only for Typescript/Javascript).
Example
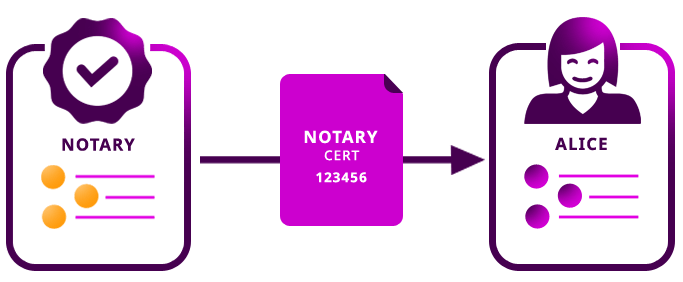
Bob works as a digital notary that stamp accounts on Symbol’s public blockchain. When a customer comes to Bob to notarize a document, he checks the authentication of the customer’s documents then tags the account with a MetadataTransaction.
Alice a recent graduate and wants her educational certificate accredited to her Symbol account to avoid the hassle of repeatedly providing verification of her degree. So she goes to Bob and provides him with proof of her degree. Once Alice pays Bob a fee, Bob verifies the authenticity and stamps Alice’s account with metadata that signifies her degree.
https://docs.symbolplatform.com/guides/metadata/assigning-metadata-entries-to-an-account.html

You can read more, and see a second example showing the use of account metadata to control user access to a company network here.
Another example might be if I were to set up a section on Symbol Blog that required a subscription, I would be able to register metadata to a reader’s Symbol account saying that they had paid their subscription. I could then check the user’s Symbol address when they accessed the site and if the metadata was present. If it was then they would be able to access the additional premium content. Don’t worry I don’t have any plans to do this, content will be free to all 😊
We actually published two translated articles a few weeks back talking more about the benefits of account metadata, one for use in a vaccine passport system and the other for subscription services.
Hashes
This is something that I needed to research when I saw this block of code. Here we are defining our metadata which will consist of a key and a value. However, we need to hash the key value.
Some background
OK many of you will know a lot more about this than I do but for those of you, like me, that saw this code and wondered why we can’t just use a string for the key and what the digest function is all about I will try to give a little background.
In cryptography data can be encoded into a hash this is a one-way function and once encoded it is almost impossible to decode into the original input. Websites use hashes of passwords for security in case their systems are compromised and the usernames and passwords of users are stolen. When logging in to the website the hash of the users password is computed and compared against the hash of that password stored in their database. If the contents of this database are stolen then the attackers would not be able to retrieve the original password strings from the hashed values.
You may also have come across md5 hashes which are commonly used to ensure the integrity of files that you download from the internet. You will know in advance the correct md5 hash of the file and then can generate the md5 hash of the file that you downloaded on your computer and compare the two. If they are the same then you know that you downloaded the file that you intended to and not something that had been tampered with. Likewise when downloading large files you can check that the transfer successfully completed and you don’t have a truncated file.
You can read more about cryptographic hashes here.
The mystery code block 😁
Before we start I will try to explain the first block of code as the first four lines stumped me when I first saw them and I had to work it through step by step to see what was going on.
hasher = sha3.sha3_256()
hasher.update('certificate'.encode('utf8'))
digest = hasher.digest()
metadataKey = int.from_bytes(digest[0:8], 'little')
metadataValue = 'aaa'
In this example we create a SHA3-256 object and encode the string 'certificate' into a binary digest of the message using hasher.digest(). If we print digest it looks like this:
b'\x86b\x0f\\~\xab\x1d\xe9q\xcb\x9d\xe4Ry\xfd\xbb$c-\x95\x022\xbb|\xc1\xb5!\xed\x1d\xbb\xf3>'
It is stored as a bytes object.
print(type(digest))<class 'bytes'>We then convert the first 8 values in digest into an integer value.
metadataKey = int.from_bytes(digest[0:8], 'little')
print(metadataKey)
Returning this value:
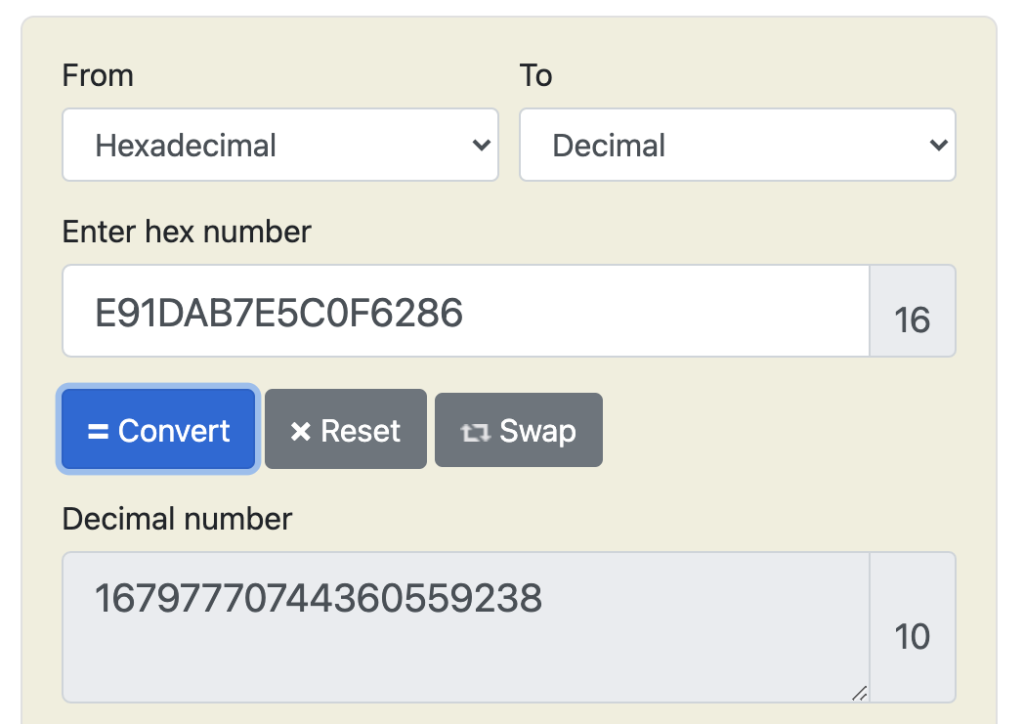
16797770744360559238It is the same as doing this:
print(digest[0:8])b'\x86b\x0f\\~\xab\x1d\xe9'test = b'\x86b\x0f\\~\xab\x1d\xe9'
metadataKey = int.from_bytes(test, 'little')
print(metadataKey)16797770744360559238What was not clear to me from @xembook’s example is whether there is a reason for truncating digest. But I assume that it is a limit on integer length as I get this error when not truncating.
OverflowError: int too big to convertWhereas it does work with a smaller number e.g. [0,2] which creates a shorter integer value.
Why do we need any of this?
Why don’t we just store the metadata as a human readable string like we would a namespace? Well I guess (and this is an assumption as I can’t find any documentation on this) that we want to try to ensure that the key is unique. If in the example above a notary is issuing certificates but anyone could copy their account metadata key then it could lead to confusion or worse fraud. You can imagine another party purposely creating an identical key and falsely validating a fake certificate by writing metadata with an identical key to another account.
I don’t know how Symbol deals with duplicate keys issued by separate accounts so this may not be the case, presumably if you all work through this example using the same string to generate the key then we would all end up generating the same key ID which would mean that unlike e.g. namespaces there is no guarantee that keys would be unique. I don’t know this for sure as I haven’t tested it though!
Looking at metadata in the wallet there is no stamp to say which account the metadata has been assigned by but presumably you would be able to check this by querying transactions on the blockchain so perhaps this isn’t a problem if the validation is performed thoroughly.
It might be the case that you want to use a more complex set of alphanumeric values in the string when generating the key though just to try to ensure uniqueness. For example the chances of two people generating a hash from a more random string ‘2g3fth8shm!’ is a lot less likely than from the dictionary word ‘certificate’.
Summary
OK that is a huge detour from the actual purpose of this exercise but I wanted to try to get this straight in my head before I went any further. There are probably errors above so please correct me in the comments if I screwed up or misunderstood! 😆
Also it would be really great to have an online resource for the Python SDK similar to the Typescript SDK documentation!
Let’s get started
So now that you have some background on what account metadata is and what it can be used for (and some poorly described information on hashes) we can start writing some code.
As usual we need to import some Python packages.
import sha3
import json
import http.client
import datetime
from binascii import hexlify
from binascii import unhexlify
from symbolchain.core.CryptoTypes import PrivateKey
from symbolchain.core.sym.KeyPair import KeyPair
from symbolchain.core.facade.SymFacade import SymFacade
from symbolchain.core.CryptoTypes import PublicKey
from symbolchain.core.sym.IdGenerator import generate_namespace_id
from symbolchain.core.sym.MerkleHashBuilder import MerkleHashBuilder
from symbolchain.core.CryptoTypes import Hash256
Next it’s this code block that I struggled with the background on 😬 The actual concept is really simple, we are just setting a key : value pair for our metadata. The key is the integer value derived from our SHA3-256 encoded byte object and here we have set our metadata value to ‘aaa’ but you can add any string you like here.
hasher = sha3.sha3_256()
hasher.update('certificate'.encode('utf8'))
digest = hasher.digest()
metadataKey = int.from_bytes(digest[0:8], 'little')
metadataValue = 'aaa'
Next we set up the transaction (see previous posts for more details). Remember to update with your own testnet account private key for Alice.
facade = SymFacade('public_test')

# Enter you own private key for Alice's account here

b = unhexlify("6BF3866928991FA3D918E64A6F057A2A9441989EBF6A6C39133A91**********")

alicePrikey = PrivateKey(b)
aliceKeypair = KeyPair(alicePrikey)
alicePubkey = aliceKeypair.public_key
aliceAddress = facade.network.public_key_to_address(alicePubkey)
str(aliceAddress)


bobPrikey = PrivateKey.random()
bobKeypair = SymFacade.KeyPair(bobPrikey)
print(str(facade.network.public_key_to_address(bobKeypair.public_key)))
print(str(bobKeypair.public_key))
strBobPubkey = str(bobKeypair.public_key)
strBobAddress = str(facade.network.public_key_to_address(bobKeypair.public_key))

bobPubkey = PublicKey(unhexlify(strBobPubkey))
bobAddress = SymFacade.Address(strBobAddress)

aliceTx = facade.transaction_factory.create_embedded({
    'type': 'accountMetadata',
    'signer_public_key': alicePubkey,
    'target_address': bobAddress,
    'scoped_metadata_key': metadataKey,
    'value_size_delta': len(metadataValue),
    'value': metadataValue
})

hash_builder = MerkleHashBuilder()
hash_builder.update(Hash256(sha3.sha3_256(aliceTx.serialize()).digest()))
merkle_hash = hash_builder.final()

deadline = (int((datetime.datetime.today() + datetime.timedelta(hours=2)).timestamp()) - 1616694977) * 1000

# Set up the transaction of type 'accountMetadata' and enter your metadata key, key length and value


aggregate = facade.transaction_factory.create({
    'type': 'aggregateComplete',
    'signer_public_key': alicePubkey,
    'fee': 1000000,
    'deadline': deadline,
    'transactions_hash': merkle_hash,
    'transactions': [aliceTx]
})

# Alice signs

signature = facade.sign_transaction(aliceKeypair, aggregate)
aggregate.signature = signature.bytes
hash = facade.hash_transaction(aggregate).bytes
hexlifiedHash = hexlify(hash)
print(hexlifiedHash)

# Bob cosigns
hexlifiedSignedHash = str(bobKeypair.sign(unhexlify(hexlifiedHash)))
cosignature = (0, bobPubkey.bytes, unhexlify(hexlifiedSignedHash))
aggregate.cosignatures.append(cosignature)

payload = {"payload": hexlify(aggregate.serialize()).decode('utf8').upper()}

strJson = json.dumps(payload)
headers = {'Content-type': 'application/json'}

conn = http.client.HTTPConnection("sym-test-01.opening-line.jp",3000)
conn.request("PUT", "/transactions", strJson,headers)

response = conn.getresponse()
print(response.status, response.reason)

hash = facade.hash_transaction(aggregate)
print('https://sym-test-01.opening-line.jp:3001/transactionStatus/' + str(hash))
Here are the values for Bob’s account address, hexlifiedHash, the node response, and the URL to check the transaction
TBV6A7GQCX4JENNNW5IQVFWP2TLNXJPU2XMYZ2A
0B36B1077CACB4187B8E44DC889506622FECE483AC734DFB9B3E006E62ECFCFD
b'488b4f50e3ec87a893fd12967f5636f5a19d749ccec30a3f03a09782baa68e3a'
202 Accepted
https://sym-test-01.opening-line.jp:3001/transactionStatus/488B4F50E3EC87A893FD12967F5636F5A19D749CCEC30A3F03A09782BAA68E3A
And lo and behold if we check the testnet explorer we can see that the metadata has been written to Bob’s account!

Just to complicate things even further(!) you will notice that the metadata key is not the same value as the integer value we used when we set up the transaction. This is just because it is stored as a hexadecimal value and we can see that it corresponds to the integer we set when converted back to a decimal.

Using an aggregate bonded transaction
You notice above that Bob is signing in this code block but you can set this up as an aggregate bonded transaction as in our previous guide. Then the transaction would be sent to Bob to confirm and he could sign in his Symbol wallet.
Summary
Oh man, that was harder to write than I thought! I should have just copied and pasted @xembook‘s code and his descriptions but I wanted to try to understand some of the steps in more detail as they weren’t obvious to me.
In the original Qiita article xembook shows how to modify account metadata but I will leave this for a separate post. I need to get my head around some more things before I write about it!
Anyway, hopefully you now know how to send a transaction which will add metadata to another account! 😊 Here is my Jupyter Notebook. Have a play around, modify the code, wrap it up in an aggregate where Bob transfers some XYM in order to pay for the metadata, have fun!
Thanks for reading and again a huge thank you to @xembook for his original article and for being a bit of an all round genius! 😁
I’m a Symbol and NEM enthusiast and run this blog to try to grow awareness of the platform in the English-speaking world. If you have any Symbol news you would like me to report on or you have an article that you would like to publish then please let me know!


Sorry, the comment form is closed at this time.