

20 Jul Getting started with Symbol in Python – part 4
This post is based on the fourth in a series published articles from @nobu_kyutech and his work on interacting with the Symbol blockchain using Python. You can find his original examples in Japanese on GitHub. You can find his original article in Japanese here along with his node details if you would like to delegate to him.
In today’s post I will cover the fourth of @nobu_kyutech‘s examples on GitHub which provides a beginners guide to using Python to interact with the Symbol blockchain. So far we have retrieved information from a node about individual accounts using the Symbol API. In today’s example we will start using the Symbol Python SDK – this is something that I have been wanting to learn how to use for a while so I am very interested to see how this goes and whether I am able to follow @nobu_kyutech‘s code 😁 If anyone working on the Python SDK is reading this then please, please produce some more comprehensive documentation so that beginners like me can really get going. The Typescript documentation seems way better but I wanted to do this in Python..
In today’s lesson will send a XYM transaction using the Symbol Python SDK. We will use the Symbol testnet so no real XYM will be sent and you can be confident experimenting without the risk of losing any money or compromising the security of your private key. If you end up working on the mainnet in the future be very careful and make sure you know exactly what you are doing and think seriously about security!
Getting set up
As with previous examples I recommend that you have Jupyter Notebook installed to run through the exercises. This time we will be using the Symbol Python SDK so you will have to install this before we get started. You can do this using pip:
pip install symbol-sdk-core-python@nobu_kyutech also recommends reading up on the Symbol REST endpoints here too.
Getting started
This step is not necessary if you are using a wallet for which you already know the private key. Here we will generate a new address and private key on testnet. If you wanted to do this on mainnet then you would need to change your code to SymFacade('public') rather than SymFacade('public_test').
from symbolchain.core.CryptoTypes import PrivateKey
from symbolchain.core.sym.KeyPair import KeyPair
from symbolchain.core.facade.SymFacade import SymFacade
from binascii import hexlify

facade = SymFacade('public_test')
new_privatekey = PrivateKey.random() # Generate private key
new_keypair = SymFacade.KeyPair(new_privatekey)
new_publickey = new_keypair.public_key # Generate public key
new_address = facade.network.public_key_to_address(new_publickey) # Generate address

print("privateKey:" + str(new_privatekey))
print("address:" + str(new_address))
print("public key:" + str(new_publickey))
This will create and then print your new Symbol testnet address along with the private key and public keys for the account. In my case it looks like this:
privateKey:E02A3B2F799AFD6E281FAD7D36A40F0B5E48A3A60113E7836C7716DC7B46A42F
address:TCUCFT222U5BFHDLTXCDNSOSZ67ZQBBGXZ7UCJI
public key:0CC9426A98F24233267834DD6C2578EE27DA63C4B83D008E86F84402AFB92B4A
Remember this is using testnet and test XYM never, ever let anyone see your private key for a real mainnet account!
Great, so we have created a new testnet account TDW2U4A5KBFPHKRIF43FLG2FVXXYBPGMTUXIZMI and have obtained the private key which will will need later.
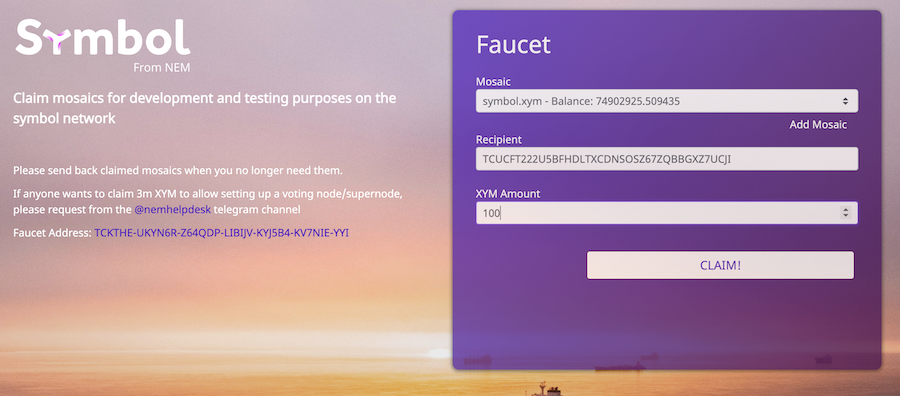
Obtaining testnet XYM
Our account is brand new and does not contain any testnet XYM so we need to fund it. Fortunately this is easy. We can just use the testnet XYM facuet and send ourselves some funds. Just paste in the address that you created and printed above and send yourself some XYM!
Right so this gets a little more complex but below we set up all of the variables that we need in order to send our transaction, these are:
- Private key, generated above
- The address that we want to send XYM to
- The amount we want to send (in microXYM)
- The maximum fee that we will pay to send the transaction
- The message that we want to send along with the payment to the recipient
- The launch time of testnet in UTC, in seconds
- An expiry time for the transaction
- The ID of the mosaic that we want to send
- The URL of the node that we want to connect to to announce the transaction
# Enter the private key that you generated above
FROM_PRIVATEKEY ="E02A3B2F799AFD6E281FAD7D36A40F0B5E48A3A60113E7836C7716DC7B46A42F"

# Enter you destination wallet address (who you want to send XYM to)
TO_ADDRESS = "TBMAGI3FR6ZFDXB5CHYTCE5EBKBSQP2CZPS7CGA"

# Enter the amount you want to send. This is in microXYM (1/1000000 XYM) so
# This transaction of 2000000 is actually 2 XYM
AMOUNT = 2000000

# Enter the maximum fee that you want to pay for the transaction, again this is in
# microXYM so the amount below 100000 would be 0.1 XYM
MAX_FEE = 100000

# Enter the message that you want to send (messages are not required)
MESSAGE = "I love symbol"

# UTC of Symbol's launch in seconds
# (testnet is 1616694977 and mainnet is 1615853185)
BIRTHTIME = 1616694977

# Transaction expiration date in hours (e.g. 2 hours)
EXP_TIME = 2

# Mosaic ID (testnet XYM = 0x091F837E059AE13C and mainnet XYM = 0x6BED913FA20223F8)
MOSAIC_ID = 0x091F837E059AE13C

# Enter a testnet node (obviously add a mainnet node if working on mainnet)
NODEURL = "http://sym-test-01.opening-line.jp:3000"
Signing a transaction and announcing to a node
Here we will sign a transaction and announce it to the node, using the parameters that we set in the code block above. This gets more complex and I have to admit I am not 100% sure on the transaction expiration date code – my interpretation is that it must be given in miliseconds so the formula is:
- (the current time + the deadline you set) in seconds
- subtract the time in seconds that the testnet went live from the line above
- multiply this number by 1000 to get the value in milliseconds rather than seconds.
We are importing from the Symbol Python SDK and will use this to set up the content of the transaction and sign using out private key. We then announce the transaction payload to our selected node and print the transaction hash and the status code.
import datetime
import urllib.request
import json
from binascii import unhexlify, hexlify
from symbolchain.core.CryptoTypes import PrivateKey
from symbolchain.core.sym.KeyPair import KeyPair
from symbolchain.core.facade.SymFacade import SymFacade

facade = SymFacade('public_test')
keypair = KeyPair(PrivateKey(unhexlify(FROM_PRIVATEKEY)))

# Transaction expiration date
deadline = (int((datetime.datetime.today() + datetime.timedelta(hours=EXP_TIME)).timestamp()) - BIRTHTIME) * 1000

# Content of the transaction
tx = facade.transaction_factory.create({
  'type': 'transfer',
  'signer_public_key': keypair.public_key,
  'fee': MAX_FEE,
  'deadline': deadline,
  'recipient_address': SymFacade.Address(TO_ADDRESS),
  'mosaics': [(MOSAIC_ID, AMOUNT)],
  'message': MESSAGE
})

# Sign the transaction
signature = facade.sign_transaction(keypair, tx)
tx.signature = signature.bytes
tx_hash = facade.hash_transaction(tx)

# Announce the transaction to the selected node
payload = {"payload": hexlify(tx.serialize()).decode('utf8').upper()}
req = urllib.request.Request(NODEURL + "/transactions",
                             json.dumps(payload).encode(),
                             {'Content-type': 'application/json'},
                             method='PUT')
with urllib.request.urlopen(req) as res:
    print("tx hash:" + str(tx_hash))
    print("status code:" + str(res.getcode()))
And it worked! If successful you will receive a status code of 202:
tx hash:731498E315DDD5811F58FF9633113AEA797164FC7E43176D6FF055A05100997E
status code:202
Checking the transaction
So in order to make double sure, we can use the transaction hash we received when we announced the transaction to the node and check that it has been approved. So the transaction hash was 731498E315DDD5811F58FF9633113AEA797164FC7E43176D6FF055A05100997E and is stored as tx_hash let’s see whether it was successful. We can go back to querying the node directly through the API.
req = urllib.request.Request(NODEURL + "/transactionStatus/" + str(tx_hash))
with urllib.request.urlopen(req) as res:
    data = json.load(res)
    print(json.dumps(data, indent=2))
This returns the following result:
{
  "group": "confirmed",
  "code": "Success",
  "hash": "731498E315DDD5811F58FF9633113AEA797164FC7E43176D6FF055A05100997E",
  "deadline": "10013817000",
  "height": "256102"
}
So we can see that the transaction was confirmed. Let’s check the hash on the testnet explorer!
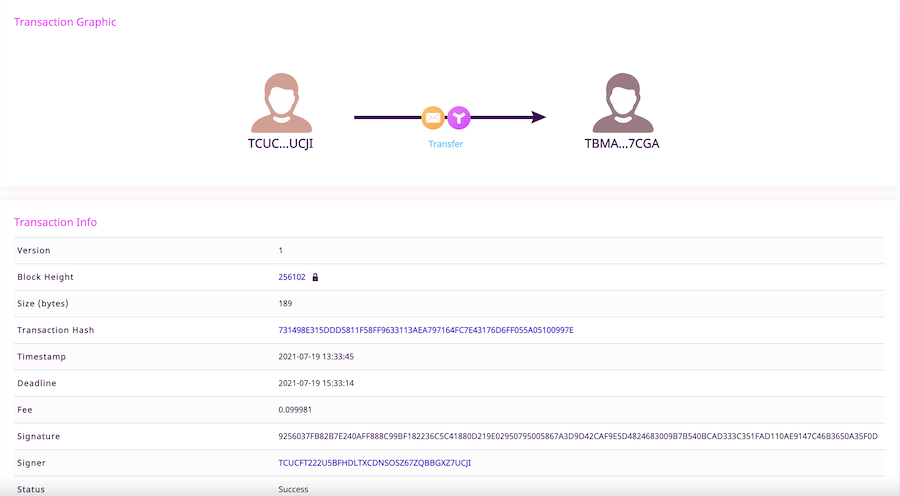
And there it is! We have successfully set up a new Symbol testnet account and sent a transaction programmatically in Python! This is pretty cool, I am now trying to think of a way to extend this and make a super simple program that will use what I have learned above. I need to get some inspiration 🤔
As pointed out by @nobu_kyutech in his post, we can also check that the transaction was received by the recipient account using the code in the second of the Python examples. Just remember to update the node to a testnet node and the mosaic ID to testnet XYM!
Finally..
I really enjoyed working through this example and learning something new! Why don’t you experiment yourselves and build on @nobu_kyutech‘s code?
Also if you would like to support him and give him some motivation to write some more examples (please do!) then consider delegating to his node 13.230.96.240. He also accepts donations to this address: NDLS6GYOIPHATATNAVVOUNJXBD6X4BXU6IRBHIY.
You can download my Jupyter Notebook here
I’m a Symbol and NEM enthusiast and run this blog to try to grow awareness of the platform in the English-speaking world. If you have any Symbol news you would like me to report on or you have an article that you would like to publish then please let me know!
Sorry, the comment form is closed at this time.