

26 Jul Experiment with Symbol using Google Chrome Developer Console!
This guide is translated from the original Japanese Qiita article from nem_takanobu aka @xembook
Thank you so much for allowing us to repost!
Introduction
We published an article recently on sending XYM using the Python SDK but this required a little bit of setup to get started. I saw this article from nem_takanobu (@xembook) recently showing you an alternative way to send XYM programmatically but this time without any complex setups and dependencies, just using Google Chrome. Literally anyone can have a go – it’s really cool! 😎
The example is written in Javascript and I have not used it before but I will try to explain in simple terms what each of the steps does and why we need them (wish me luck)! It may be difficult to understand at first but it hopefully will give you some insight as to how the process works and what goes into sending a transaction on the Symbol blockchain.
This exercise will use the testnet and I would recommend not to send transactions on mainnet using this method. It is for educational purposes only 😆
Prerequisites
- An internet connection
- Google Chrome browser
(it really is as simple as that!)
The code that you run also uses external packages but you do not need to install these locally on your machine. Specifically it requires @xembook‘s nem2-browserify which in turn relies on the Symbol Typescript/Javascript SDK.
You will also have to use the Symbol testnet faucet to obtain some XYM for this exercise and we will use the testnet explorer to view transactions.
Launching the developer console and calling the Symbol SDK
First we need to navigate to the node we will use to make our transaction. This could be any testnet API node. In this example we will use the testnet node http://ngl-dual-001.testnet.symboldev.network:3000/node/info.
This URL will show you some information about the node and you should see a screen that looks like this.

Next we need to open the Developer Console in Google Chrome. This is where we will run our code to send a Symbol testnet transaction. You can do this by pressing F12 when the browser Window is active. Tip – if you are using a Mac like I am you will need to hold the function key (fn) and then press F12.
Alternatively you can navigate to “View” -> “Developer” -> “Developer Tools”. You should then see an additional panel on the right of the screen. Just make sure that you are in the “Console” tab in Developer Tools.

OK, now we are good to go so let’s get started!
Initial setup and library import
Before we go any further we need to set some basic parameters and import the nem2-browserify Symbol SDK.
We set the following parameters:
- node – this is the node that we are currently viewing in our web browser
- network generation hash – the hash value of the first block created on the testnet (we can find this in the node details displayed in the browser)
- epoch adjustment – this is genesis block epoch time adjustment
These values are correct for testnet (but will be different for mainnet). The values do not need to be changed if you you use a different testnet node as the node address is gathered automatically from the browser window.
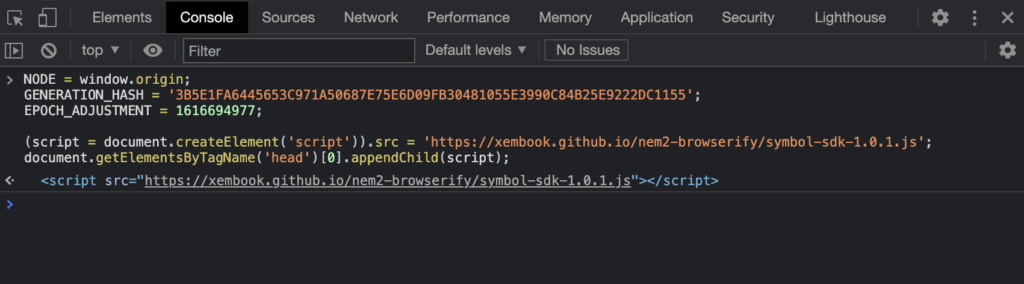
NODE = window.origin;
GENERATION_HASH = '3B5E1FA6445653C971A50687E75E6D09FB30481055E3990C84B25E9222DC1155';
EPOCH_ADJUSTMENT = 1616694977;

(script = document.createElement('script')).src = 'https://xembook.github.io/nem2-browserify/symbol-sdk-1.0.1.js';
document.getElementsByTagName('head')[0].appendChild(script);
We can copy and paste the the code above into the Developer Tools Console and after pressing enter we see that the script tag has been successfully embedded.
Importing the Symbol SDK library
Next we simply need to import the Symbol SDK. Just type the following into the console and press enter.
nem = require("/node_modules/symbol-sdk");Create a new testnet Symbol account
Let’s set up a new Symbol account on testnet. We will store the account details as alice. Note – this will generate a new account every time that you run this command. Therefore the address you see in my example will be different to the one that you generate yourself.
alice = nem.Account.generateNewAccount(nem.NetworkType.TEST_NET);If we type the line above into the console it will generate a new account. If you click the arrow to the left of Account then you will see the account address and other details.
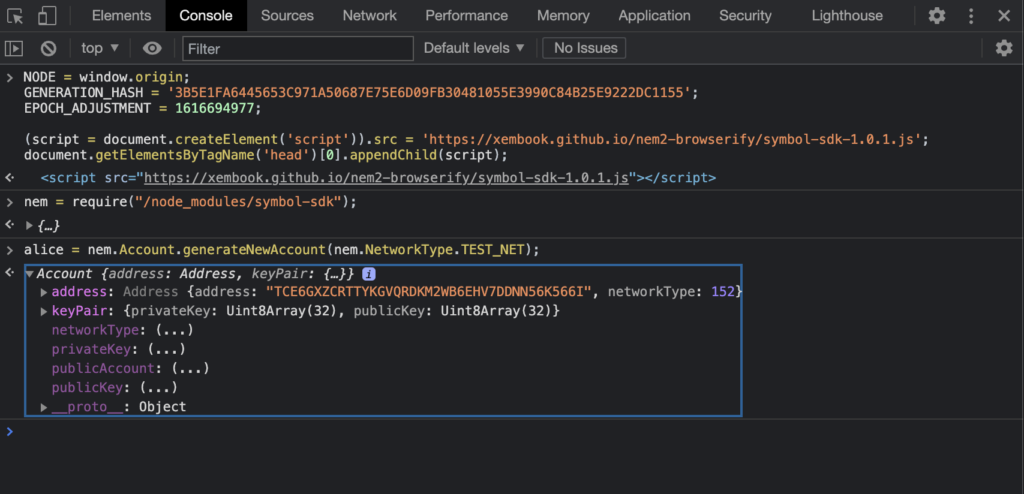
Here we can see the address we created is TCE6GXZCRTTYKGVQRDKM2WB6EHV7DDNN56K566I yours will obviously be different!
Funding our new account
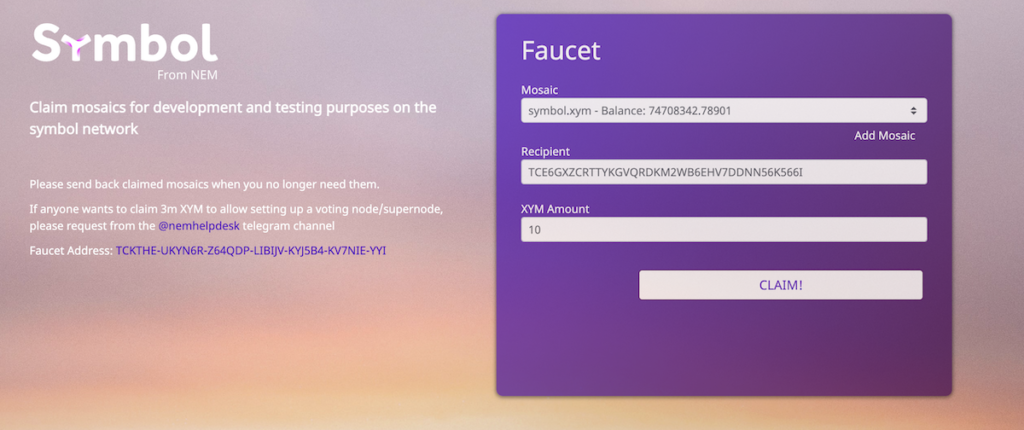
We have an account but at present it is empty. We want to be able to send some testnet XYM so we need to use the faucet to do this. Now you could do this by opening a new tab, going to the faucet and entering your address above but we can also do this using the console.
"http://faucet.testnet.symboldev.network/?recipient=" + alice.address.plain() +"&amount=10"This command generates a faucet URL and prefills the address we generated. It also asks for 10 XYM. If you enter this line in the console it will generate the URL which you then need to click. Once clicked it will take you to the faucet website and you will need to click the “CLAIM!” button. After this 10 XYM will be sent to your new address.
Checking our balance
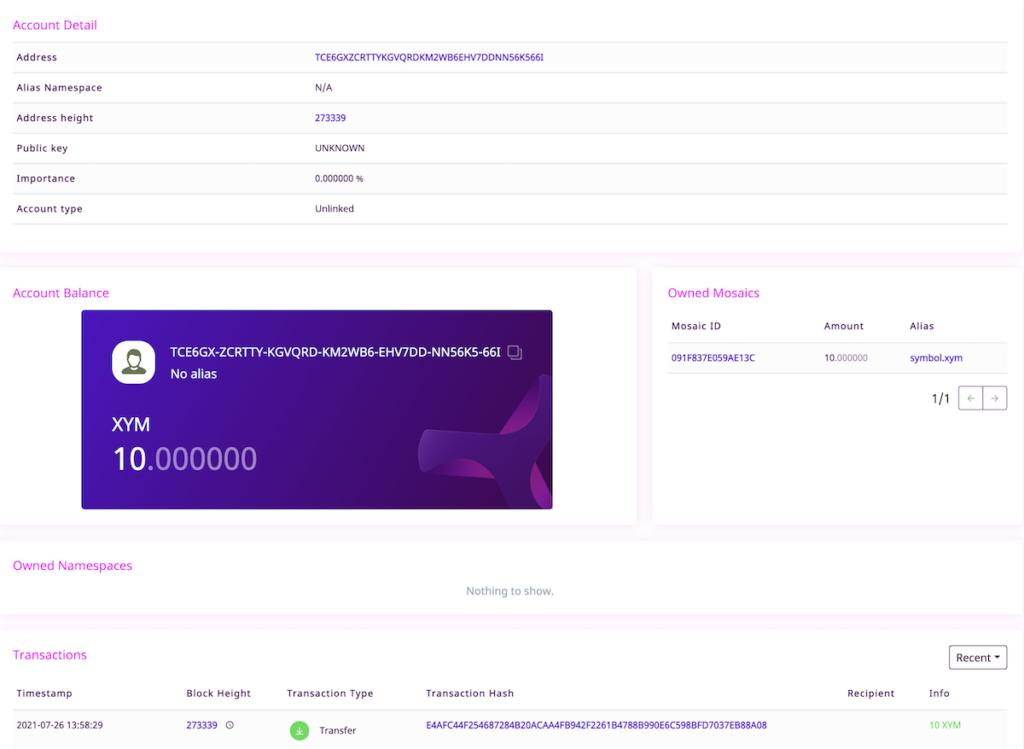
You can either visit the testnet explorer and search for your address manually or just paste this code into the developer console, press enter and then click the link.
"http://explorer.testnet.symboldev.network/accounts/" + alice.address.plain()You will see that your account now contains 10 XYM!
Sending a transaction
So now we have set everything up, created and funded a new account. We are ready now to send a transaction..
Let’s create a transaction to send 1 XYM back to the faucet address TCKTHE-UKYN6R-Z64QDP-LIBIJV-KYJ5B4-KV7NIE-YYI and announce this on the testnet.
We will split this process down into its component parts:
- Creating the transaction
- Set up the details of the transaction e.g. what mosaic we want to send, how much should we send etc.
- Signing the transaction
- Sign the transaction with our account private key
- Announcing the transaction
- Submit the signed transaction to the node for inclusion on the blockchain
Creating our transaction
Here we set create a new transaction with nem.TransferTransaction.create. We include the EPOCH_ADJUSTMENT parameter we set previously, the recipient address TCKTHEUKYN6RZ64QDPLIBIJVKYJ5B4KV7NIEYYI and set the mosaic ID. In this case we are using testnet XYM and the mosaic ID is 091F837E059AE13C.
We also specify the amount of XYM that we would like to send. XYM has a divisibility of 6 and the base unit is in microXYM (1 millionth of 1 XYM). We therefore have to say that we are sending 1,000,000 units which will send a 1 XYM transaction.
We want to include a message “Hello Symbol from NEM!” using nem.PlainMessage.create.
Finally we set the network to testnet and set a maximum fee for the transaction to 100,000 microXYM (or 0.1 XYM).
tx = nem.TransferTransaction.create(
    nem.Deadline.create(EPOCH_ADJUSTMENT),
    nem.Address.createFromRawAddress("TCKTHEUKYN6RZ64QDPLIBIJVKYJ5B4KV7NIEYYI"),
    [new nem.Mosaic (new nem.MosaicId('091F837E059AE13C'),nem.UInt64.fromUint(1000000))],
    nem.PlainMessage.create('Hello Symbol from NEM!'),
    nem.NetworkType.TEST_NET,
    nem.UInt64.fromUint(100000)
);
If we run this code in the console we can see that we have set up a new TransferTransaction and if we click on the expand arrow it shows all of the details that we set up above.

Signature
Next we need to sign the transaction that we have just created. This can be achieved simply by running this single line of code in the console.
We are signing the TransferTransaction called tx that we just set up. We need to also provide the network generation hash GENERATION_HASH we set up earlier.
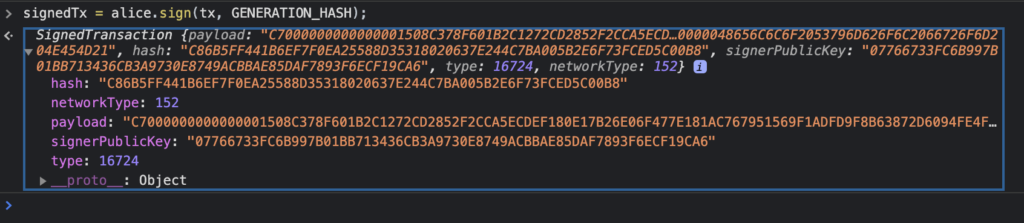
signedTx = alice.sign(tx, GENERATION_HASH);When you run this line of code in the console you will create the SignedTransaction called signedTX. You should see output similar to this if the transaction has been signed successfully.
Announce the signed transaction to the network
So far we have created a new transaction and signed this with our account private key. The next step is to announce this new transaction to the node for inclusion on the blockchain.
We can do this by creating a new TransactionHttp specifying the node we are using. If you remember back that far, we set the variable NODE to the node that we were connected to in our browser which in our case was http://ngl-dual-001.testnet.symboldev.network:3000/node/info.
We then just announce the signed transaction signedTx to that node.
new nem.TransactionHttp(NODE)
    .announce(signedTx)
    .subscribe((x) => console.log(x), (err) => console.error(err));
If the transaction was announced successfully then you will see the message "packet 9 was pushed to the network via /transactions" displayed.

Note: Acceptance of a transaction by a node is not a guarantee of that it has been approved on the Symbol blockchain. We need to therefore check the approval status separately.
Checking the transaction has been confirmed
The following code will generate a URL where you can check the transaction status using the hash of the signed transaction.
console.log(NODE + "/transactionStatus/" + signedTx.hash);If you click the link then you will see the status of the transaction. Here we can see that is has been successfully confirmed. As the “group” shows confirmed and the “code” shows Success.

If you prefer a prettier output then you can confirm in the explorer. This code will generate the URL for you.
console.log("http://explorer.testnet.symboldev.network/transactions/" + signedTx.hash);Just click the link generated and you will be able to see your transaction details on the testnet explorer.
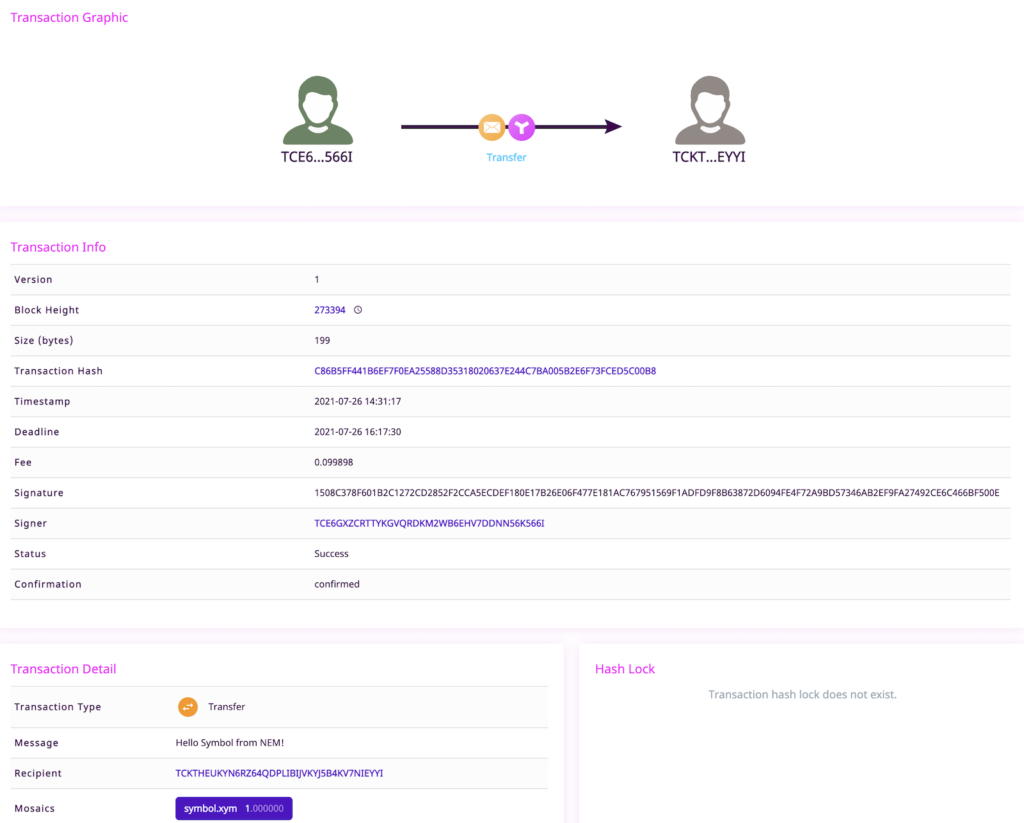
And again we see it is successful and are able to view details of the transaction!
And that’s it!
I think that this guide is excellent so thank you so much @xembook for making it possible to do all of this through the developer console and for your thorough guide which made it easy for me to follow.
As usual I encourage you, the readers to give this ago and have some fun, don’t be afraid to experiment with your own ideas and tweaks to the code.
I am amazed that you can do this through Google Chrome and there is zero headache with setting anything up so there’s really no excuse for you not to give this a go! 😆
I’m a Symbol and NEM enthusiast and run this blog to try to grow awareness of the platform in the English-speaking world. If you have any Symbol news you would like me to report on or you have an article that you would like to publish then please let me know!
Sorry, the comment form is closed at this time.